How to Find SFML 2.5.0 with CMake
Overview
In version 2.5.0 of the SFML library, major changes were made to the way CMake finds the package. In this tutorial, I’m going to teach you how I did it, so you can use it in your own projects. This tutorial already assumes that you know at least a little bit about C++, SFML and CMake. If not, you can read up about them here and here.
This tutorial is only going to cover a very basic implementation of SFML, and won’t go into including additional modules and libraries.
Preparation
First, you’re going to create some folders to keep your project in:
project-name/
	└ bin/
	└ include/
	└ src/
binis where your build chain is going to end upincludecontains all of the.hand.hppheader filessrcis where your.cppsource files go
Once you have those, create a text file in the src directory, and call it
Main.cpp. If you’re on Windows, now might be a good time to alter your File
Explorer settings so that the extensions are visible. Otherwise you might end
up with Main.cpp.txt unknowingly, which would cause all sorts of problems.
Open the source file with a text editor and fill it with the following code:
#include <SFML/Window.hpp>

int main()
{
	sf::Window window(sf::VideoMode(800, 600), "My window");

	// Run the program as long as the window is open
	while (window.isOpen())
	{
		// Check all the window's events that were triggered
		// since the last iteration of the loop
		// `event` is a reserved keyword in C++,
		// hence why use `e` instead
		sf::Event e;

		while (window.pollEvent(e))
		{
			if (event.type == sf::Event::Closed)
			window.close();
		}
	}

	return 0;
}
Once we’ve gone through all of the steps to compile it, this code should tell your computer to make a blank window appear that you are able to close after an indefinate amount of time without anything crashing.
CMake
At this point, you’ll want to make sure that CMake is installed on your
computer. You can download it for the official website, or get it using apt if
your operating system allows for it. If you’re on Windows, make sure to edit
your environment variables to include the folder where CMake is installed.
Once you’re sure that you have CMake in the first place, create another text file
called CMakeLists.txt at the root of your project, and type the following
code into it:
# Ensure that this script can only be run with modern versions of CMake that
# use config files
cmake_minimum_required(VERSION 3.0)

# Tell CMake what our project is called
project(MyWindow)

# Find version 2.5.0 of the SFML library on this computer,
# but only use the graphics package
# If the package can't be found, terminate the script
find_package(SFML 2.5 COMPONENTS graphics REQUIRED)

# Tell the compiler where the source code is, and add it to the executable
add_executable(LilyTin src/Main.cpp)

# Add the following SFML module to the application:
target_link_libraries(LilyTin sfml-graphics)
This script tells CMake how to generate your project, and is required to have the exact filename and path in order to work properly.
SFML
In order for CMake to find SFML, you need to install it on your computer. You can just head over to the website and get the prebuilt binaries for your platform, but by building it yourself, you avoid a whole host of compatability and pathing issues.
You might be tempted to put the SFML files inside your project folder, but we’re going to do something a little more clever than that, and build them independently. If you truly want to keep your project cross-platform, then you’ve got to keep in mind that each of the official binaries will only work with one kind of computer. Doing it this way makes it much easier to build your project, even if you have to rebuild SFML for each different computer you work on.
Building the library is fairly straightforward if you’ve done something like this before, but in case you haven’t, you might want to read this first.
Project Generation
Once you have a build of the library that’s compatible with your computer, it’s time to generate a build chain that you can use to compile your source files into an executable. The way you do this differs depending on which interface you use:
CMake Command Line
Navigate to the root directory of your project using cd (change directory)
and type:
cmake . bin
Which means “generate the project in the current directory, and output the
resulting files to the bin folder”. You might want to double-check that the
folder exists, but if it doesn’t, CMake may offer to create it for you.
By default, CMake will use the standard compiler and build method for your
operating system, but you can change this using additional flags when you type
the command.
CMake GUI
Open the CMake GUI. Set your source folder to the root directory of your
project, where CMakeLists.txt is:

Then tell CMake where you want the generated files to go. Here, we want to use
the bin folder:

Next, configure how you want your project to be built using the Configure
button at the bottom left:
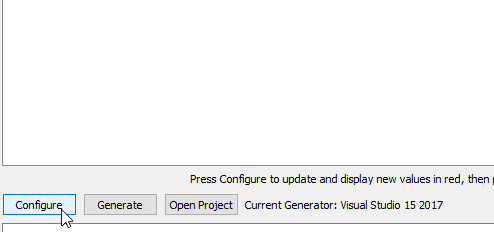
Then hit Generate, which is the button right next to it.
If your build was successful, you shouldn’t see any errors and the files you
wanted should now be in the bin folder. If it didn’t work, read the errors
carefully and try again. It may take a few attempts before you figure out what’s
wrong. Make sure to test your new project files by attempting to compile them.
Conclusion
That’s it! It’s a relatively straightforward process, and one that you’ll no
doubt get better at with time. Enjoy your brand-new, cross-platform C++ project
with CMake! If you’re taking this project further, you might want to replace
the Window object with a RenderWindow for easy drawing, and use a variable
to add your source files to the executable via CMake’s set function,
so that you don’t have to type your entire list of them multiple times.
If you’re writing a game, chances are you’ll also want to include more than just
the graphics module into your application. you can do this by typing additional
module names into your find_package and target_link_libraries calls, though
keep in mind that the names for target_link_libraries all have sfml- at the
front where find_package just has the name in lower case.